Delightful Strawberry Crunch Cheesecake Tacos 🍓🧁✨
1. Introduction
If you’re searching for a unique dessert that combines the creamy richness of cheesecake with the fun portability of tacos, then you’ll love this strawberry crunch cheesecake tacos recipe. This innovative dessert boasts layers of luscious cheesecake filling, crunchy toppings, and fresh strawberries, all wrapped in a soft tortilla shell. It’s perfect for parties, summer gatherings, or whenever you want a sweet treat that’s both visually appealing and delicious.
2. Ingredients for this irresistible cheesecake
- 1 cup of cream cheese, softened
- 1/2 cup of powdered sugar
- 1 teaspoon of vanilla extract
- 1 cup of fresh strawberries, sliced
- 1 cup of crushed graham crackers or biscuit crumbs
- 1/2 cup of melted butter
- 8 small taco shells or tortillas
- Whipped cream and additional strawberries for garnish
- Optional: coconut flakes or chopped nuts for extra crunch
3. Step-by-step instructions for making strawberry crunch cheesecake tacos
Prepare the cheesecake filling
In a mixing bowl, combine the softened cream cheese, powdered sugar, and vanilla extract. Beat until smooth and creamy. Chill in the refrigerator for about 15 minutes.
Make the crumb topping
Mix the crushed graham crackers with melted butter until well combined. This will give you a delicious crunchy layer that pairs perfectly with the creamy filling.
Assemble the tacos
Lay each taco shell flat and spread a generous layer of cheesecake filling inside. Top with sliced strawberries and sprinkle with the crumb mixture. Garnish with whipped cream, extra strawberries, or chopped nuts as desired.
Finish and serve
Fold the tacos gently or leave open-faced for a beautiful presentation. Serve immediately to enjoy the crisp crunch and creamy filling, or refrigerate for up to 2 hours before serving for a cooler treat.
4. Storage tips for leftover cheesecake tacos
If you have leftovers, store the assembled tacos in an airtight container in the refrigerator for up to 24 hours. For the best crunch, consider assembling the tacos just before serving rather than storing fully assembled—they tend to get soggy over time.
5. Serving suggestions and pairing ideas
This cheesecake treat pairs beautifully with a cold glass of milk, iced coffee, or a fruit-infused sparkling water. For added flair, sprinkle some edible glitter or colorful sprinkles on top. For more quick and delightful desserts, check out our easy no-bake Moose Farts Delight or explore other sweet recipes that will impress your guests.
6. FAQs about strawberry cheesecake tacos
Can I substitute the cream cheese?
Yes. For a dairy-free option, use vegan cream cheese or Greek yogurt to create a similar creamy texture.
How long does it take to prepare this dessert?
The total prep time is approximately 20-25 minutes, with an additional 15 minutes for chilling the cheesecake filling.
Can I make these ahead of time?
Yes, but it’s best to assemble just before serving to keep the tacos crisp and fresh.
Are there any healthy modifications?
You can reduce the added sugar, use whole-grain tortillas, and top with more fresh strawberries for a healthier version. For more nutritious ideas, visit our healthy cranberry apple sweet potatoes.
7. Kitchen tools that you might need for this recipe
- KitchenAid Classic Iconic Stand Mixer — Make mixing the cheesecake filling effortless and smooth, saving time and effort.
- Ninja SLUSHi Pro RapidChill Drink Maker — Perfect for keeping your ingredients cool while preparing cold desserts.
- CAROTE Premium 16pc Nonstick Cookware Set — Essential for preparing ingredients efficiently and cleaning up quickly after.
8. Final thoughts
The strawberry cheesecake tacos recipe offers a delightful twist on traditional desserts, blending creamy cheesecake with fresh fruit and a crunchy topping. Whether you’re serving a crowd or simply indulging yourself, these tacos are sure to satisfy. Experiment with different toppings or even add a drizzle of chocolate sauce for an extra touch of decadence. Dive into this fun and easy-to-make dessert and enjoy every sweet bite!
9. Conclusion
In summary, delightful strawberry crunch cheesecake tacos are a wonderful way to combine the classic flavors of cheesecake with the playful nature of tacos. Ready in under 30 minutes, this dessert is perfect for impressing guests or enjoying as a special treat at home. Try this recipe today and turn your favorite dessert into a delicious taco feast!
Print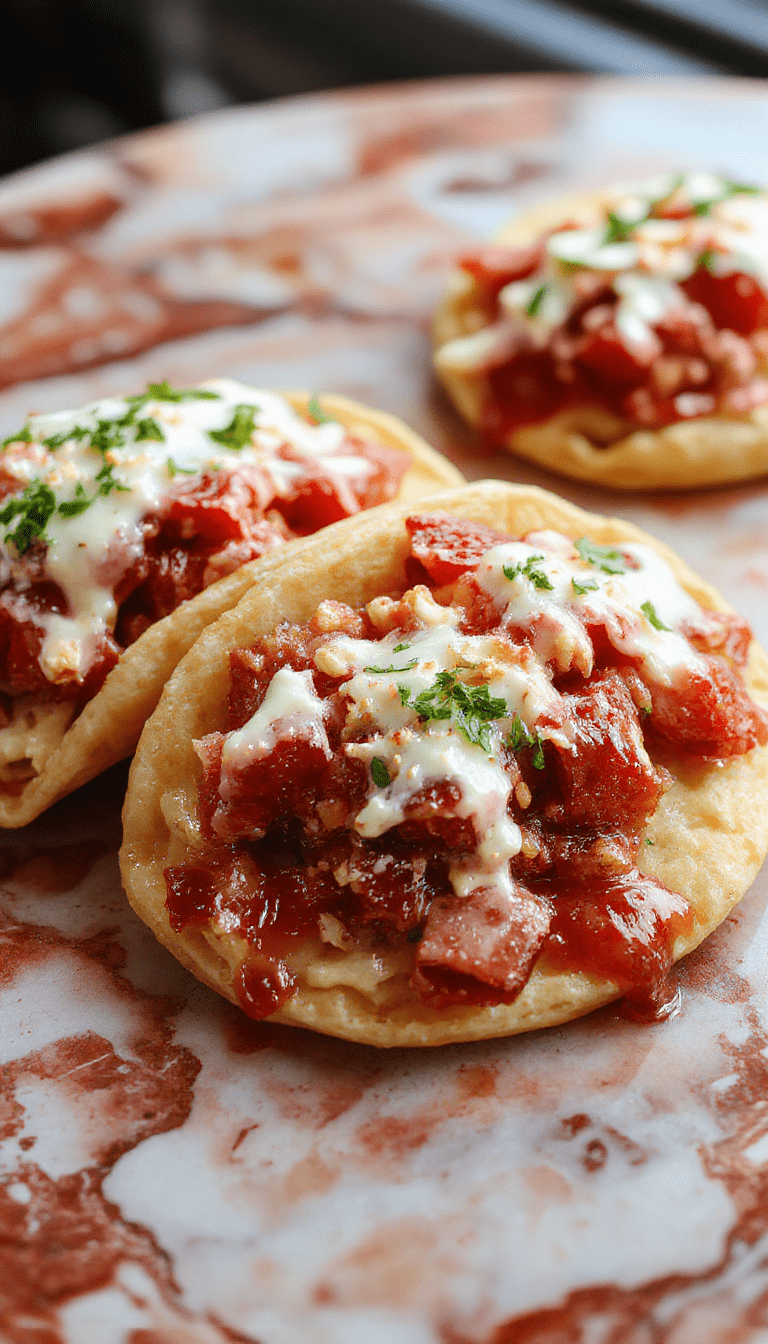
Delightful Strawberry Crunch Cheesecake Tacos
A fun twist on traditional cheesecake, these strawberry crunch cheesecake tacos feature a crunchy shell filled with creamy cheesecake and fresh strawberries.
- Total Time: 10 minutes
- Yield: 4 servings
Ingredients
- 4 large taco shells
- 8 oz cream cheese, softened
- 1/2 cup powdered sugar
- 1 teaspoon vanilla extract
- 1 cup fresh strawberries, sliced
- 1 cup crispy cereal (like Rice Krispies)
- Optional garnish: mint leaves, additional strawberries
Instructions
- Mix the softened cream cheese with powdered sugar and vanilla extract until smooth.
- Spread the cream cheese mixture evenly inside each taco shell.
- Fill with sliced strawberries.
- Sprinkle crispy cereal on top for crunch.
- Garnish with mint leaves or extra strawberries if desired.
Notes
You can prepare the filling ahead of time and assemble just before serving. Feel free to substitute different fruits or cereals for variety.
- Prep Time: 10 minutes
- Cook Time: 0 minutes
- Method: Assembly
- Cuisine: American
- Diet: Vegetarian
Nutrition
- Serving Size: 1 taco
- Calories: 250 kcal Kcal
- Sugar: 15 g
- Sodium: 120 mg
- Fat: 16 g
- Saturated Fat: 9 g
- Unsaturated Fat: 6 g
- Trans Fat: 0 g
- Carbohydrates: 22 g
- Fiber: 2 g
- Protein: 4 g
- Cholesterol: 30 mg
2 thoughts on “Delightful Strawberry Crunch Cheesecake Tacos”